cse15l-lab-reports
Lab Report 4
The following lab report will demonstrate some git commands alongside file editing using nano. This will be a quick demo of Lab 7 and note that this is done in a clean slate. This means that the bash history is cleared.
1. Logging Into ieng6
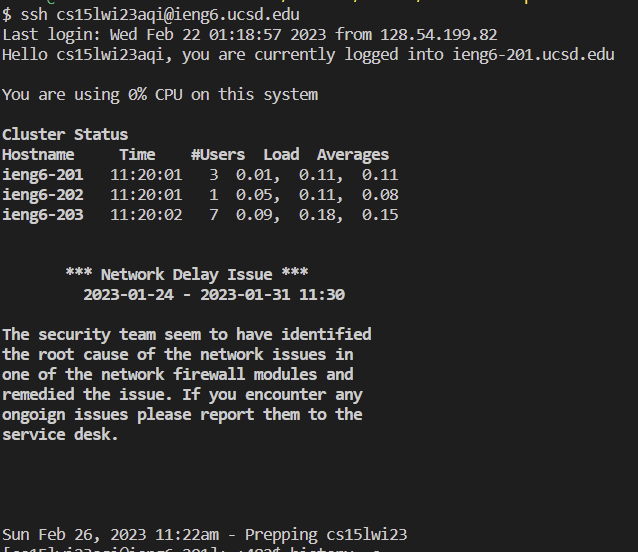
First, inside virtual studio code ssh into the remote server by typing:
ssh cs15lwi23xxx@ieng6.ucsd.edu
This is already assuming you’ve completed the earlier steps of setting up a ssh key to avoid having to type the password all over again. Remember the xxx is your own privately assigned letters. Remember that ssh means “secured shell” which is used to access the remote server.
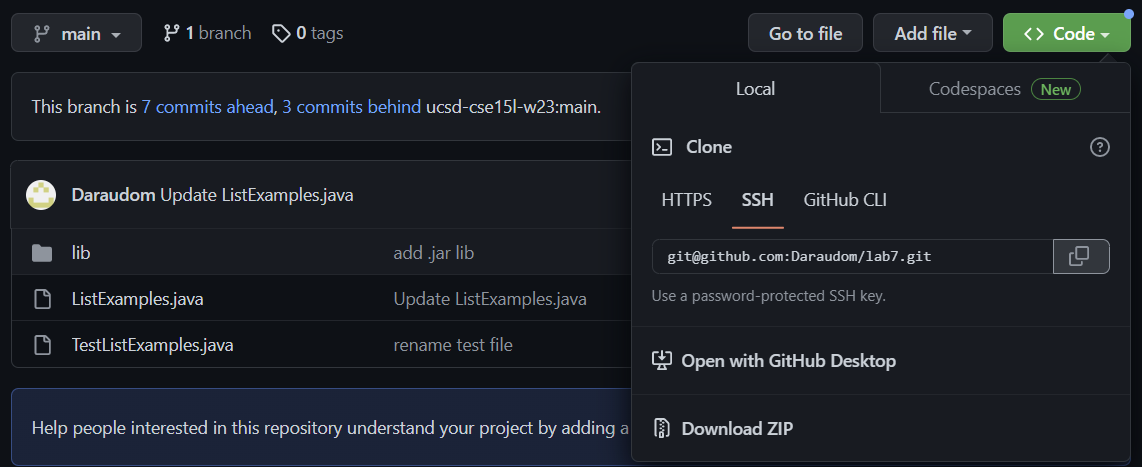
2. Cloning the fork of the Repository
Next, retrieve the ssh url of the file you’re trying to clone from the forked repository. Refer
to the image below:
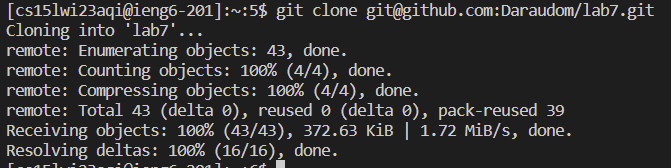
Next, head back to vsCode and clone the forked repository using the ssh link you copied to your clip board by typing the followingg:
git clone <repo link>
Recall that git clone is the command we used to clone a repository from github given its link. The output should look like the following:
3. Running the Initial Test
Next, cd into the repository folder to begin compiling the test. Recall that cd refers to changing directory. Inside the Lab 7 directory, run the following command to compile and run the test.
$javac -cp .:lib/hamcrest-core-1.3.jar:lib/junit-4.13.2.jar *.java
$java -cp .:lib/hamcrest-core-1.3.jar:lib/junit-4.13.2.jar org.junit.runner.JUnitCore TestListExamples
The output should look like the following image:
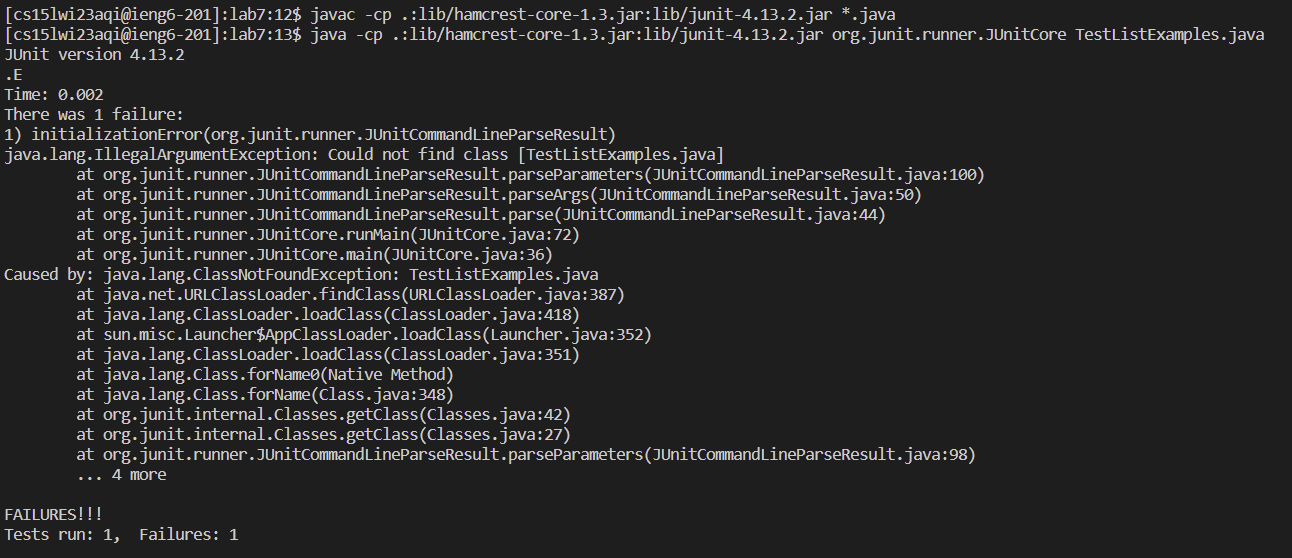
Notice that there’s a test that failed.
4. Editing Code to Fix Test
To fix the code that causes the test to fail, type nano TestListExamples.java to fix the code. Notice that the old code says index1 += 1. Change it to
index2 += 1 according to the image below.
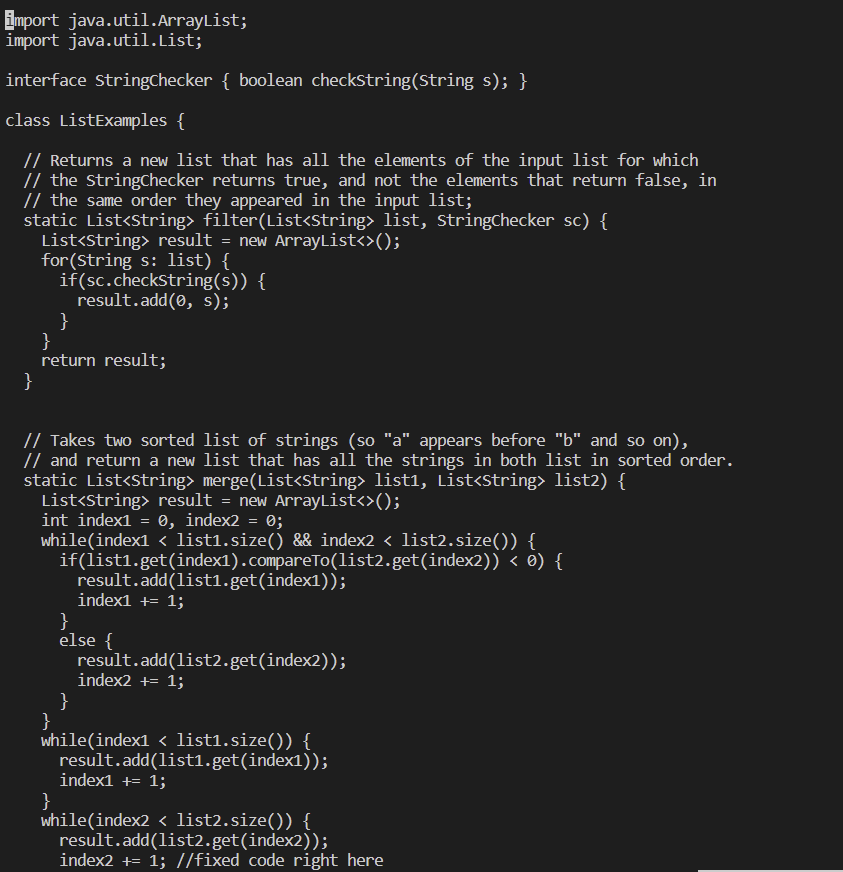
To save the file, type ^O (<Ctrl + O>) to save the file and type ^X (<Ctrl + X>) to exit from nano.
5. Running Test to See Test Passes
Next, recompile and run the test again. Since we’ve used the commands javac -cp ... and java -cp .. already before, we can call it again by pressing ^r <Ctrl + R> and began typing javac. The result should pop up again. Hit (enter). Likewise do the same for java -cp.. by pressing ^r <Ctrl +r>.

The test should appear that it passes.
6. Git Commit and Push
FInally, type git commit -a. The following screen should pop up.
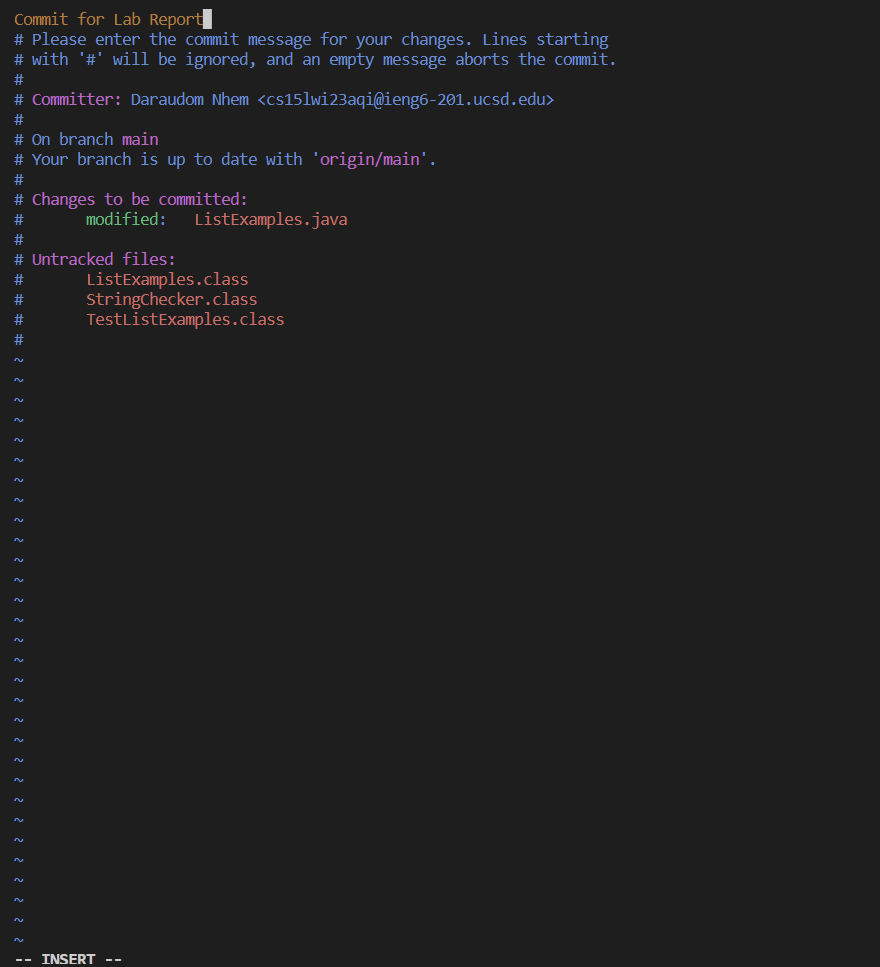
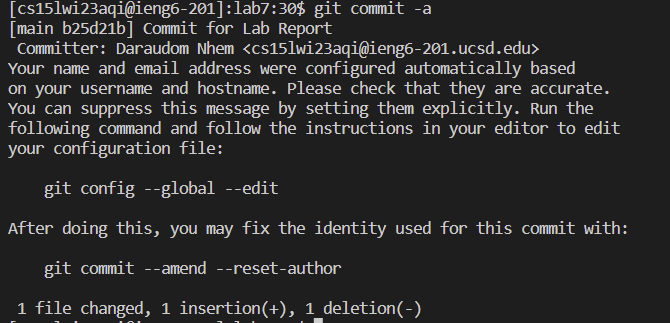
Hit < enter > to begin typing a commit message. Hit < esc > to exit editor mode to view mode. Type :wq to commit the changes and exit. The output should look like the following image:
 .
.
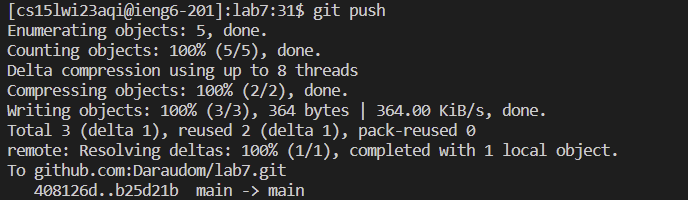
After that, type git push in the terminal to push the commited changes to remote server. The result should look like the following:
 .
.